Last Updated on March 14, 2025 5:52 am
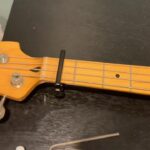
My guitar has a few notes that buzz. I have taken it to good guitar techs before, and it plays great for a while, but eventually starts buzzing again. This time I thought I could make some adjustments myself, but when I raise the string height, so they don’t sound, the action is too high. Thus, the solution I found to stop fret buzzing is to adjust the truss rod.
Which way do you turn a truss rod to stop buzzing? When adjusting a truss rod, in either direction, the applied force to the rod is changed. The kinds of forces that act on a truss rod are compression, tension, and torque. Loosening a truss rod (turning counter-clockwise) enhances relief to (decreases tension on) the neck, which results in increased (higher) string action height.
Tightening a truss rod (turning clockwise) rises compression, thereby pushing the center of the neck away from the strings. Which way one turns a truss rod depends on the desired effect. Before tightening the truss rod, it’s always good to give it a short counter-clockwise turn to loosen it.
What is Truss Rod:
A truss rod is a metal bar (usually made from steel or graphite), strengthening the neck of a guitar, bass, or other stringed instruments. When tuned up to pitch, the strings will put several hundred pounds of pressure on the neck –more than enough to bend it. Also, a truss rod’s work is to counteract that tension and allow the player to adjust how much (or how little) the neck bows.
All guitar truss rods are alike only with regards to their planned function, to adjust neck relief. All truss rods are made of steel. In truth, it’s merely a convenient part of the guitar whose job is to control the neck’s general curvature. As the neck is a long and skinny piece of timber, fighting to pull off six strings is a lot to ask for – the truss rod allows us to fight back.
The truss rod setting (i.e., the curvature of the neck) is critical for the entire guitar’s set up – what’s worse is the neck will move with humidity and temperature too, so it’s worth keeping an eye on it.
Single Action Truss Rod:
Single-action truss rods are the most common truss rod in commercially manufactured instruments. These rods are designed to be tightened, thereby increasing pressure on the back of the neck. It results in the neck forcing to bow backward. The purpose of this is generally to counteract the tension of the strings to straighten the neck.
This rod can be adjusted back and forth to accommodate relief, but if one tries to create a forward bow, it will soon hit a limit.
Dual Action Truss Rod:
A dual-action, aka double-action, truss rod enables users to make neck adjustments in both directions (up or down). Exclusively, dual-action truss rods can create relief with or without string tension. Two-way truss rods have alteration points (nuts) at each end.
Dual-action truss rods are threaded on both sides and have a fixed bar running along the length.
Checking Relief:
Check the amount of relief throughout the adjustment process. Starting with a neck relief check to get an idea of how much adjusting is required is the best way. An important thing to note is that the full effect of adjusting the truss rod is not immediate. The neck usually has a bit of a delayed response. To minimize stress on the neck, don’t turn the truss rod over a 1/4-turn in 24 hours. Recheck the relief of the guitar, and adjust as necessary.
There is no standard, single measurement that works for every guitar, as a guide one can use .008″ to .015″. The optimal amount of relief is mostly a personal preference.
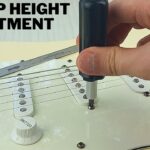
After accomplishing this, if the string action is still not preferred, one may need to adjust the bridge saddle heights. After making these adjustments, one may need to check and adjust the intonation. Because the neck responds slowly, the tone may need to reset after a few days.
How Truss Rods Affect Playability:
The relief of the neck can be changed by adjusting the truss rod, which affects the guitar’s action and intonation. Let’s look at how relief and action affect playability.
Relief:
It should be pretty evident that a truss rod’s primary function is to adjust the relief of the neck. The comfort of the neck plays a significant role in playability. A large bow can be frustratingly uncomfortable to play, while a straight neck with slight relief can feel amazing.
If the player finds that the guitar is harder to play in some fretboard areas than others, then it is time to check the neck’s relief.
Action:
Action is the height of the strings over the frets. The greater the distance, the higher the action. Every guitarist has a different preference when it comes to action. Some guitarists prefer the lowest action possible (strings very close to the frets), while others are happy with higher action.
Truss rods affect the action of the guitar, but it’s only part of the picture. The other part of controlling action is from the guitar’s bridge. The critical point to remember with action is that too much action affects the intonation, and too little action can cause fret buzzing.
Related Questions:
How to Get Rid of Fret Buzz?
One can get rid of fret buzzing in most cases by adjusting the truss rod. If the frets buzz in the lower part of the fretboard (e.g., smaller than 7th fret), it means there isn’t enough relief in the neck. Loosen the truss rod to create more comfort. If the frets buzz above the 12th fret but nowhere else, add some slight relief by loosening the truss rod. If that doesn’t work, adjust the bridge to raise the action slightly.
What type of tools to use for adjusting the truss rod?
To properly adjust the truss rod, one should use them the appropriately sized tool. Regrettably, this isn’t straight forward as the type of tool one needs depends on the guitar. Some guitars use standard Allen hex wrenches in various sizes, while others use specifically made cranks that only work on certain guitars.
But before going on hunting, take a moment to acquaint with some possible tools and how to use them. The truss rod’s nut type determines the tools one needs.
Some tools are:
- Hex Key
- Nut Driver
- Screwdriver
- Box Wrench
- Miniature Screwdriver
How to tune intonation in a guitar?
Intonation is how in-tune the guitar is across the fretboard. One might think that if the player tunes the strings that the entire guitar will be in tune, it isn’t that simple. Intonation is controllable from the bridge, but adjustments one makes to the truss rod can affect intonation.
A slight relief in the neck creates low action in the higher frets while preventing fret buzz in the lower frets. Little action can create better intonation. The critical point to remember with intonation is that any adjustments that are done to the truss rod can affect intonation.
Why can’t I turn my Truss Rod?
One should be able to adjust a truss rod without much force. If the player can’t turn the truss rod one way, try turning it the other way. Moreover, if it can turn the other way, it means that the truss rod is at the limit.
If the truss rod isn’t turning the other way, it’s a sign that it is broken or damaged. It is time to get it checked by some professional to avoid further damage.
Conclusion:
Don’t adjust too much at once. Preferred action is to turn the truss rod about a ¼ of a turn at a time until one gets familiar with how the truss rod will react. Always re-tune the guitar before checking the adjustments. Some necks will not adjust right away. In some cases, it’s better to make adjustments and let the neck settle overnight to ensure no over-adjusting has been done.
Don’t force anything. If excessive resistance is felt during an adjustment, the truss rod could be maxing out. The further modification could damage the instrument. An inspection by an experienced technician is recommended.
Make the proper adjustments and enjoy musical tunes on the buzz-free guitar. Small efforts are always welcoming in keeping the instrument healthy and protected.
